Shooting is a perishable skill. With ongoing surges in demand for firearms and ammunition, staying sharp isn't as easy as it once was. Most people, including me, are reluctant to burn our ammunition stash or empty our bank accounts. The solution falls back on an old classic: dry fire.
There’s a caveat, though. Many shooters think of dry fire as only the repetition of sight alignment, grip and trigger pull. This works, and legions of bullseye shooters and Olympians taught us that there is a lot of skill gained this way. A complete dry fire program, however, covers so many more skills than “dry fire” insinuates.
Many shooting skills do not require live ammunition whatsoever. In fact, some shooting ranges disallow drawing from holsters, practicing malfunctions, performing reloads under time and movement. These vital shooting tasks are perfect candidates for safe practice in the comfort of our own homes and with near zero cost.
Building a Dry Fire Program
All discussions about dry fire should start with a nod to safety. You must ensure that your dry fire session remains a dry fire session, and that no live rounds enter the mix. Use identifiable dummy ammunition, and remove all live rounds from your practice space. If using a daily carry gun for the session, it's vital to establish a ritual of verifying the firearm is safe before the session starts. Likewise, reload the gun with live ammunition before returning it to service.

Always follow the basic safety rules of muzzle awareness, trigger discipline, knowledge of your target and what’s behind it. Make sure you know what’s behind the wall you might be aiming at, and attempt to construct a reasonable backstop.
The Basics of Dry Practice
Comprehensive dry practice programs cover nearly every shooting skill except for managing recoil. Even then, recoil is at least partially mitigated through proper grip and body positions, both of which are easily practiced with dry fire. I like to break skills down into five major components, which apply to handguns and long arms alike: presentation, accuracy, manipulation, timing and movement.
Presentation is the act of setting yourself up for a good sight picture. With handguns, this includes drawing from a holster. For the rifle, presentation might start at the low ready, high port or even having the rifle slung up behind you as if you were carrying it on a hunt. I also include building a position and establishing a natural point of aim with my body as part of the presentation.
The accuracy component includes sight alignment, sight picture, and trigger control during the firing cycle. For the marksmanship purists, this is also where I include breathing. Within the manipulation component, we practice reloads as well as malfunctions. I further divide reloads into in-battery and out-of-battery. Malfunctions are weapon system dependent, of course.

Timing does not only mean training for speed, but refers to honing a particular cadence or rhythm. Steve Anderson, author of Refinement and Repetition, describes cadence as, “A somewhat advanced technique meant to free you from the double tap…pause…double tap mode of firing that is prevalent among some shooters.” Practice might include a particular pace from shot to shot, but I also include a by-the-numbers approach to other components like presentation and manipulation.
Movement refers to moving your physical body during a drill. This could be turning, walking or transitioning from position to position or target to target within a string of fire. A solid dry practice program touches on each of these components individually, and then combines them for increased challenge. You do not have to spend large amounts of time doing this. If you can only commit 10 to 20 minutes per-day of deliberate practice, four or five days per week, you will still see dramatic improvement in your skills.
During these sessions, you must perform tasks as correctly as possible. If your session is going well, then keep going with it, but if it’s not- feel free to cut it short or switch to a different task. Remember that practicing correctly matters just as much as creating a habit of practicing regularly.
Treat the program as progressive. Start with one or two components per session. Then, as you gain proficiency with individual tasks, start combining them together. For example, one session might include 10 minutes working only on a proper draw and presentation of a handgun followed by 10 minutes of sight alignment and trigger squeeze work. Another session could be 10 minutes each practicing reloads and malfunctions. A more advanced session combines all three into a draw-fire-reload-fire sequence.
Tools for Success
Simply working through repetitions helps any shooter “grease the groove” of marksmanship, to borrow a phrase from famed strength coach Pavel Tsatsouline. To reach higher levels, you must incorporate measurable feedback. The easiest way to do this in dry-fire practice is with a shot timer and its “par time” function. Luckily, you can do this for free with phone apps which replicate the same thing.
The goal is introducing a little bit of time stress for each repetition of your practice session. For example, set the par timer for a generous five seconds and perform ten repetitions of drawing and firing your handgun. Take your time to correctly execute the draw, obtain a proper sight picture, and squeeze the trigger. You want to execute this perfectly, so do not rush it. After ten repetitions, decrease the par time by a half to a full second and do it again. Repeat this until you’ve reached the edge of your performance envelope, and then stop. Do not reinforce poor performance by practicing incorrect technique done “faster.”

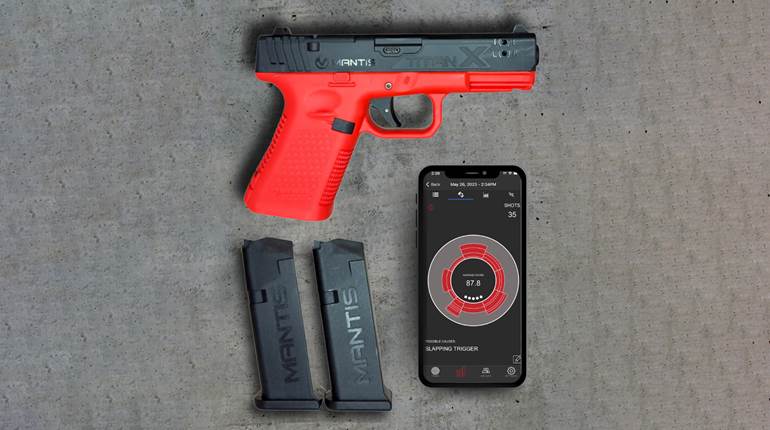
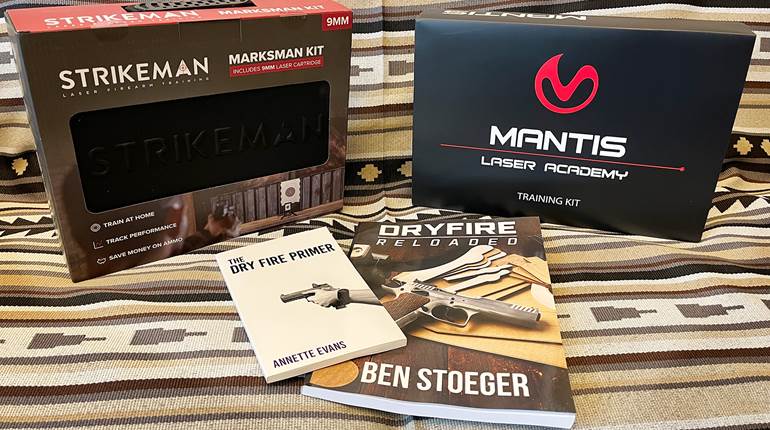
Another great tool incorporates visual feedback for every shot. The simplest way to do this is by calling your shot, which means noting exactly where the sights were when you squeezed the trigger. A better way is with a dummy laser cartridge and a target. Even better is something like the Mantis Laser Academy, a tool I’ve become a fan of over the last year. At its core, the Laser Academy system includes a dummy laser cartridge, a target and a phone application. The application uses the phone’s camera to “watch” your target and documents “impacts” from the laser.
Laser Academy Programs
There are a few things about the Laser Academy that really helps it stand out to me when it comes to dry practice programs. First, it uses a set of scaled targets modeled after common real-world examples. Whether it’s an IPSC silhouette, bullseye, or the dreaded dot drill, the app recognizes which target you’re shooting at (or multiple targets), and then scores your hits accordingly.
Secondly, the Laser Academy app includes a par timer functionality and I’m able to follow the exact progression I mentioned earlier, but with honest feedback about both timing and accuracy. As a bonus, the app also includes time-to-shot and split times for multiple shots if you’re interested in training with that.
One of the known issues from using laser cartridges is height over bore and other point of aim/point of impact (POA/POI) issues. The Laser Academy app allows me to compensate for that with an automatic calibration function. This eliminates any frustration I might have from the projected dot being slightly higher, lower, or shifted laterally from my actual sights and prevents me from having to compensate aim to still score 10s.

Lastly, Mantis includes a series of built-in drills to work from. As with their accelerometer-driven MantisX system, the app includes courses to help progress shooters through skill levels and encourage regular practice. A little-known bonus about the training courses is that Mantis will send you a physical patch for bragging rights when you complete them.
Should you be working with an AR-15 for these drills, Mantis also offers the Blackbeard system, which not only projects a laser with each shot, but also resets the trigger for you.
Establishing Goals
You should always have a goal in mind for your practice sessions. If you’ve never had to pick a target for yourself, let me offer a suggestion. I’ve interviewed several USPSA Grand Masters, law enforcement firearms trainers, and tactical “gurus” to try and establish a baseline set of skills for the average citizen to pursue.
When it comes to handguns, the consensus is that the average citizen should strive for placing a single shot in the A-Zone of a USPSA target placed at 7 yards in 1.5 seconds or less. That might sound difficult, but with a steady regime of dry practice, good feedback, and tools like shot timers or Mantis Laser Academy, you will be surprised how quickly you can achieve this.

For rifles, try this: from a low ready position, present the weapon and place a single “hit” on a 3" by 5" index card placed at 7 yards in less than one second. Once you’ve reached these goals, reduce the par time by a tenth of a second and go for it again. Or, if you have the space, back away from the target or use an even smaller one.
Dry fire is the secret weapon of professional shooters around the world. If you forge a habit out of regular dry fire practice, you'll be amazed at how much better your performance becomes at your next range session. For more information on the various dry-fire training aids offered by Mantis, visit mantis.com.


