Mike didn't want the readers who are considering building their own receivers to feel left out because we used a factory-finished receiver. So, after the rifle was completed, I was invited back to the shop to see how an AK receiver is built from a flat stamping.
MOD Outfitters applies their company name and a serial number to the flat before work begins.
The flat is bolted into a jig which folds the stamping into shape using the hydraulic shop press. 


The bent stamping, now formed into a receiver, is removed from the jig and checked to ensure that it's properly shaped. It is now ready for the front and rear trunnion holes to be drilled and the internal rails to be spot welded in place. 


The front and rear trunnion are bolted into jigs so that rivet holes can be drilled and deburred, just like a factory-finished receiver. 

The front trunnion is set into the receiver and held in place temporarily with rivets and tape to provide a reference point for positioning the interior rails in relation to the front of the receiver. A 15/64 drill bit is just the right size to set the gap distance between the rails and the top of the receiver. 
The internal rails are longer than needed to allow builders to cut them to just the right length for their receivers. 

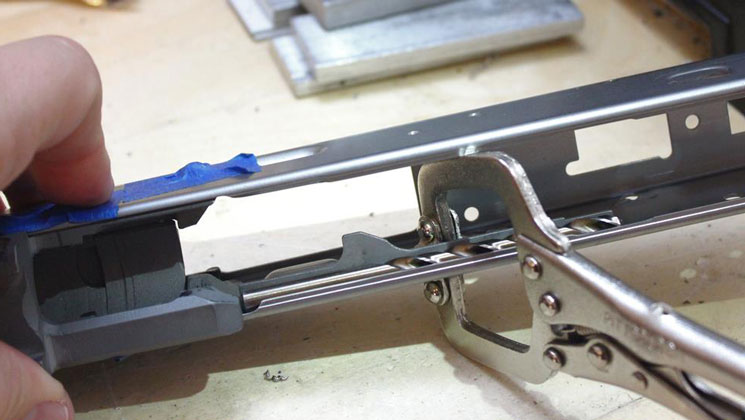
The rails are clamped in place for a series of spot welds. Gary pointed out that the neatness (or sloppiness) of the spot welding is usually a good indicator of how much time and care went into the rifle. 


The internal rail gaps are checked once more. The rails cover up the axis pin holes in the receiver so they need to be drilled and deburred once they are in place. 

Receiver flats are stamped from annealed (mild) steel that is easy to bend and shape but too soft for the rigors of gun fire. There are three ways to solve this problem. One option is to buy a finished receiver which is hardened at the factory. Another is to fully heat treat the receiver yourself using a kiln or a forge, but the equipment for this is fairly expensive.
A third option, often favored by small shops and home builders, is to perform a spot heat treatment of the receiver. Gary used a hand held MAPP gas torch to heat the receiver and a bucket of brine (a water, salt and soap mixture) to quench it. The spot heating process is quick, inexpensive and provides plenty of durability for the levels of use and abuse that civilian gun owners deal out to their semi-auto rifles. 
Heat treatment locations include the ejector and axis pin holes. 

Using brine (instead of oil) to quench the receiver has its advantages. However, it can leave a rusty-looking scale on the metal. The receiver is scrubbed to remove any scaling, dirt or debris.

After being wiped down and inspected one more time, the completed receiver is ready for the finish to be applied.
Continue Reading "Build Your Own AK":
Build Your Own AK-47: Introduction
Build Your Own AK-47: Part 1--Selecting Components
Build Your Own AK-47: Part 2--Populating the Barrel
Build Your Own AK-47: Part 3--Populating a Factory-Built Receiver
Build Your Own AK-47: Part 4--Bending and Welding a Receiver Flat
Build Your Own AK-47: Part 5--Refinishing and Reassembly
Build Your Own AK-47: Part 6--At the Range
Build Your Own AK-47: Conclusion


