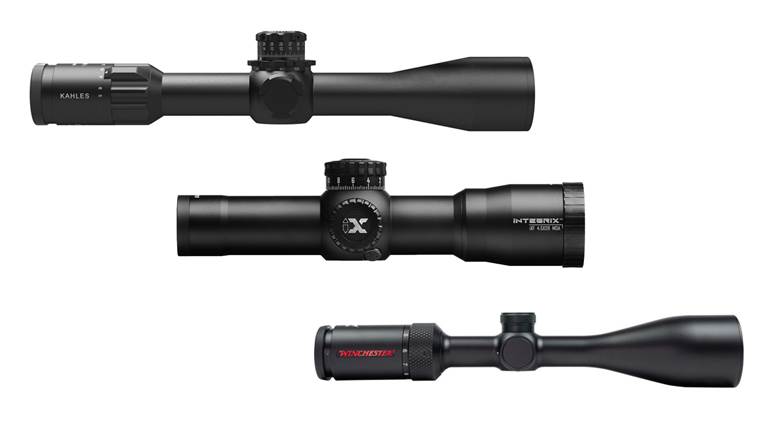
Windage and elevation, Mrs. Langdon, windage and elevation.” That sage advice came from Col. John Henry Thomas (John Wayne) in “The Undefeated,” a film set in the era immediately after the Civil War, but it seems particularly appropriate today, when many shooters prefer adjusting their scopes for windage and elevation.
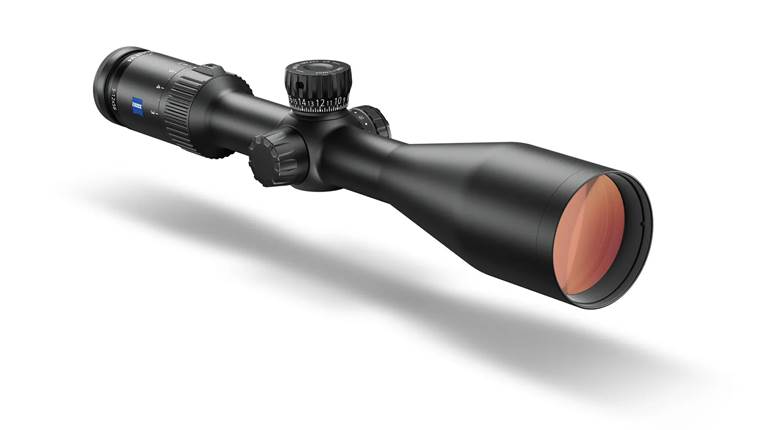
Modern scopes adjust for point-of-impact by turning two knobs, one on top of the scope for elevation, the other on the side for windage. The knobs that the shooter turns are actually the tops of screws pressing against an erector assembly, which consists of a second tube with optical lenses that lies inside the main scope tube.
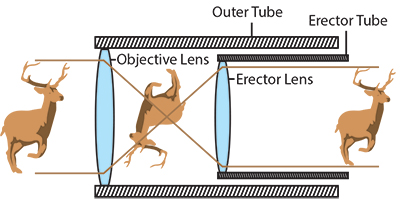
The erector tube’s function is partly optical, “erecting” the image: If a scope only contained the convex lenses at each end, the image would appear upside down, making aiming somewhat difficult. This inversion can be easily demonstrated by looking through two magnifying glasses in approximately the same positions as a scope’s front and rear lenses, the first a couple inches from your eye and the other about a foot away. The erector tube usually contains several lenses and, as it is adjusted from side-to-side within the scope, affects the firearm’s point of impact.
Only the rear end of the erector tube connects directly to the main exterior tube, usually with a two-axis gimbal, a pivoting frame. Before Google Earth, most people were familiar with the two-axis gimbals on the map models of our planet called globes. The gimbals allowed globes to both spin and tilt, so we could easily examine places from Antarctica to Zanzibar. An erector tube doesn’t spin, but does need to move horizontally and vertically inside the scope.
A spring system presses the erector tube against the bottoms of the windage and elevation screws. When the adjustment screws are turned inward, they push the erector tube against the spring system; when the screws are backed off, the spring system moves the tube.
This sounds simple and foolproof, but in most rifle scopes the pair of adjustment screws sit at what a target shooter would call 12 o’clock and 3 o’clock, and a flat spring sits opposite the adjustment turrets at approximately 7 o’clock, between the erector tube and the main tube. A single spring can’t provide nearly as much push as the two adjustment screws, and, as a result, the erector tube may not move when the adjustments are backed off.
As an example, while sighting-in, a shooter fires a three-shot group at 100 yds., centered 4" low and 3" left of the aiming point. The shooter then turns the adjustments 4" high and 3" right, but the fourth shot lands in the original group, because the erector tube didn’t move.
The recoil of the fourth shot, however, jars the erector tube against the adjustment screws, where the spring was supposed to push the erector in the first place. But the shooter doesn’t realize this, so he or she adjusts the scope again. The fifth shot may end up at the aiming point, but the sixth shot probably won’t, because the recoil knocked the erector tube loose again.
Such erratic adjustments were common in early internal-adjustment scopes, partly because they often had 3/4" or 7/8" tubes, and thus provided little room for a strong spring. However, as recently as the early 1990s one optically superb and fairly expensive brand of scope had really weak adjustment springs. After the scopes were sighted-in they worked great, but getting them there could be a real trial. Sometimes two or even three shots needed to be fired to really settle the scope down. I had several such scopes but eventually sold them, using the money to buy scopes that could be sighted-in without firing an entire box of ammunition, even if their optics weren’t quite as good.
This is why some shooters (particularly those of a certain age) tap the dials with an empty cartridge case after any adjustment. Many don’t understand the mechanical reason for the tapping ritual, just that it’s supposed to help the adjustments “take,” but it’s not always necessary. American-style scopes (including those made in China) have adjustments with right-hand threads. When we turn the dials clockwise, like we’re tightening a bolt, the screw underneath the dial pushes directly against the erector tube, firmly shoving the erector tube in the direction it’s supposed to go.
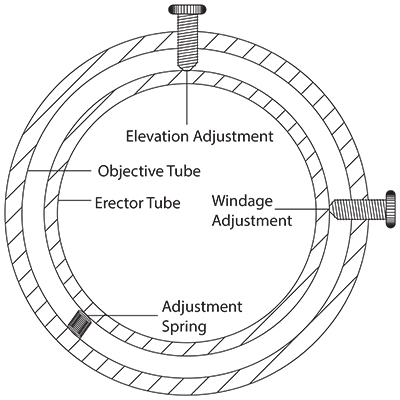
Problems occur only when we turn the dial counter-clockwise, and erector-tube movement depends on the spring. Tapping the dial afterward can then knock a balky erector tube loose, allowing the spring to shove it against the adjustment screws—but so can bumping a rifle’s recoil pad on the ground, simulating recoil. However, some European scopes have left-threaded adjustments, another reason many shooters always tap the adjustments no matter which way they’re turned.
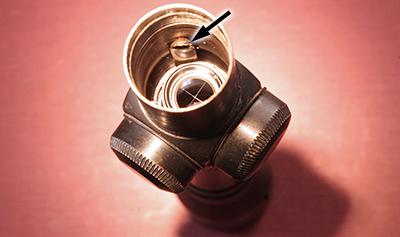
You can often see these parts by peering inside the objective lens of your scopes with the help of a flashlight. The erector tube is always visible, and the adjustment spring sometimes appears as well, though often you have to back the adjustment screws all the way out before the erector tube moves enough to reveal the spring. In many scopes the erector tube barely extends past the turrets, and you can see not only the spring but the ends of the adjustment screws.
The big trick is to clean the objective lens thoroughly before taking a look, because even a little dust creates a lot of flare, but before scopes were thoroughly sealed against outside moisture, most could be easily taken apart at home. Which is exactly why some ended up back at the factory after their curious owners couldn’t put them back together.
Thanks to the appearance of affordable laser rangefinders in the late 1990s, even the adjustments of many lower-priced scopes work far more reliably than those earlier models, because so many shooters want to run the elevation dials of their scopes up and down. However, accurate adjustments on lower-priced scopes don’t hold up to that kind of repetitive use.
A few years ago a certain scope company sent several shooting writers samples of a brand-new scope with a very affordable price. The adjustments on mine were precisely repeatable, even compared to some far more expensive scopes, and within a few months I’d heard the same thing from other writers. I still have that scope, but the adjustments aren’t what they used to be.
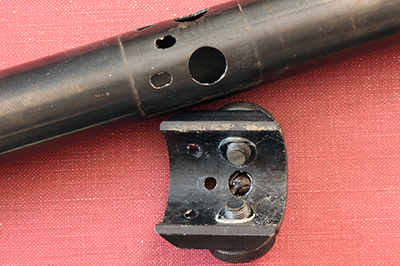
The reason the adjustments don’t work as reliably now, of course, is the erector-tube spring has weakened with time and use. This often happens, especially on scopes designed to be simply sighted-in and left that way, rather than dialed for different ranges. The reason is simple economics—most shooters don’t want to pay for adjustment springs that stay strong forever.
When new, the clicks on that scope felt pretty crisp, and on calm days, with no one yacking at me, I could even hear them through my earmuffs, which is saying something for an “experienced” shooter. However, contrary to what many shooters believe, the clicks of adjustment dials aren’t connected to the erector-tube spring. Instead, clicks are created by notches around the perimeter of the dial, combined with a tiny spring in each adjustment turret. In many older scopes this was obvious, because the click spring stood right out in the open, next to the notched edge of the dial, but today both the spring and notches are hidden inside the turret.
Like an erector-tube spring, a dial spring can weaken with use, and the notches around the dial can wear, resulting in mushy clicks and slightly erratic adjustments. Scopes with consistent and long-lasting adjustments use strong erector and turret springs, combined with adjustment click-notches that don’t wear after relatively little use.
Some scopes use a pair of flat erector springs, and a few feature a coil spring housed in a little “knob” at the 7-o’clock position opposite the adjustment turrets. Some place the spring system at the rear end of the erector tube, leaving more room inside the scope for either larger lenses or more adjustment range. Several Swarovski scopes have coil springs in the rear end of the erector tube, and in some Simmons scopes the entire rear end of the erector tube is essentially a spring.
Accuracy of adjustments, however, is also affected by the size of the erector and main tubes, especially at the extremes of adjustment range. This wasn’t as much of a problem in the days when shooters sighted-in rifles and then left their scopes alone, but when we click the elevation adjustment to shoot at long range, the contact point of the windage screw may meet the curvature of the erector tube at a slight angle.
This can also happen when a scope’s not aligned reasonably closely with the bore. Even if there’s enough scope adjustment to sight-in, point-of-impact may not track perfectly straight along horizontal and vertical lines, one reason tube diameters of internally-adjustable scopes have increased since they started becoming popular in the 1930s. Back then, most American scopes had 3/4" or 7/8" tubes, and unless precisely mounted in line with the bore the adjustments could work in strange ways. A larger scope diameter allows the use of a larger erector tube, providing a broader area of contact for the adjustment screws.
The highest and best use of an optical collimator isn’t sighting-in a rifle, since we can do that through old-fashioned bore-sighting. Instead, a collimator helps us to align our scope with the bore during mounting, then precheck the adjustments before going to the range, by watching the reticle’s movement across the collimator grid while turning the adjustments.
Many of the “faulty” adjustments shooters supposedly encounter in new scopes are actually the result of poor mounting alignment. I mount a lot of scopes every year, including some old ones, and in small-diameter scopes the moving reticle can perform interesting gymnastics. Some even follow S-curves when only one adjustment dial is turned, and smaller curves aren’t uncommon even in modern scopes at the extremes of their adjustment range.
Also, despite modern computer machinery, the final assembly of scopes is performed by humans. New scopes sometimes have machining marks or tiny bits of grit on their adjustment threads, creating slight hitches in the reticle’s movement. These aberrations can often be eliminated by turning the adjustment dials all the way through their range a few times.
Many shooters feel compelled to tighten ring screws like they tighten lug nuts on their pickup, because they worry about the scope shifting in the mounts due to the vicious recoil of their .243 Win. Well, if you really tighten those rings, the erector tube may not be able to shift inside the scope the way it’s supposed to—another reason for erratic adjustments in scopes “right out of the box.” Torque specifications for scope rings are measured in inch-pounds and not foot-pounds.
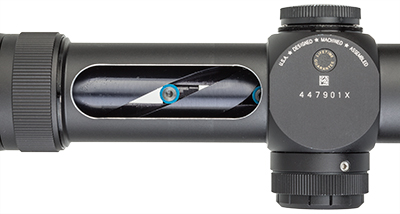
I’ve even seen variable scopes turned into fixed-powers by gorilla-tightening, and the adjustments of variables are also more commonly affected than those in fixed-power scopes. Variables change magnification by sliding the erector lenses lengthwise inside the erector tube. This requires yet another tube outside the regular erector tube, with angled slots to cam the lenses back and forth, leaving less room inside the main tube than the single-wall erector tube of fixed-power scopes.
If you crush a variable scope even slightly while tightening the mounting rings, the erector tube won’t be able to move as much during windage and elevation adjustments. It may also move erratically, or even “jump” to a different position during the rifle’s recoil, like the erector tube in a scope with a weak erector spring.
The extra cam tube is the reason variable scopes usually allow less windage and elevation adjustment than fixed-power scopes of the same basic design. It’s also why scopes with 30-mm body tubes have become popular among longer-range shooters: There’s more room inside the main tube for the erector tube to move up and down. Of course, this depends to a certain extent on how each company engineers their scopes, and relatively few make fixed-power scopes today.
Today’s riflescopes are superior to those of even a generation ago, both optically and mechanically. Still, understanding how they work can help us get the most out of what they have to offer.


