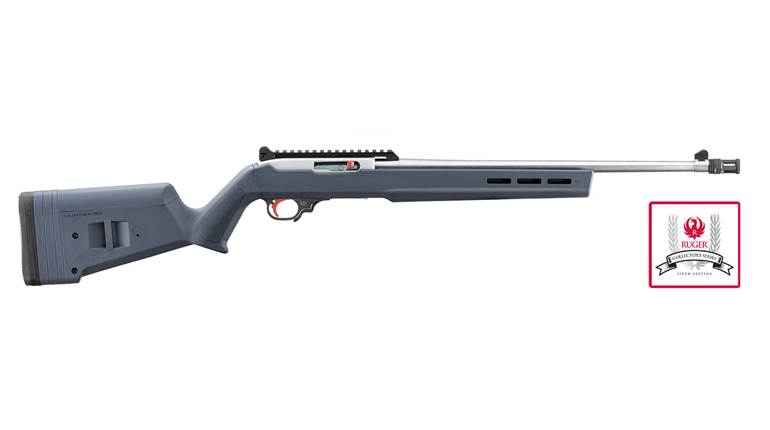
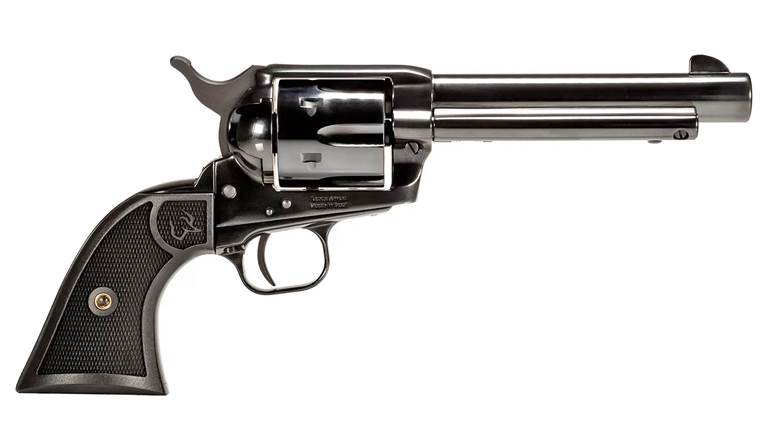
When released to the shooting public in 1964, the rimfire Ruger 10/22 retained the sleek outline of the company’s earlier Model 44 center-fire carbine. With a curved buttplate and a profile not unlike that of the M1 carbine, both Rugers served up a nostalgic combination of Western and World War II flair. The 10/22 had all the right properties: it looked good, felt good and worked well.
The 10/22 was positioned by Ruger as “a worthy companion to the .44 Magnum Carbine,” and the two were characterized as “ideal hunting companions ... identical in size, balance and style, and nearly the same in weight.”
Soon, the popularity of the 10/22 led Ruger to create two variations to complement similar variations of the Model 44: the Sporter and the International. The Sporter had a finger-groove stock in walnut; a hand-checkered version for $10 extra followed. The International had a full-length stock in the fashion of Mannlicher-Schoenauer carbines—it, too, was offered in a checkered variation for $10 more.
Over time, the so-called finger-groove stock was replaced by the Sporter stock that we see today. The International has come and gone and come back again. Circa 1986, the first laminated stocks were offered, then composite stocks in both carbine and Sporter form, and then in hyper-modern target stocks. Today, the 10/22 is available in many different versions to meet the differing needs of a wide range of shooters. There is the original carbine, with many variations on the carbine theme: threaded barrel, hardwood, laminate, composite stock, Takedown and even integrally suppressed models.
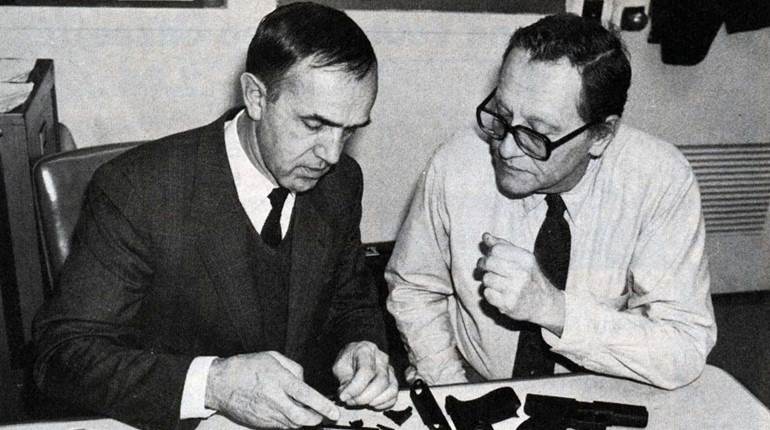
The magic of the 10/22 stems from three creative innovations: the barrel block, the rotary magazine and the anti-bounce bolt. Bill Ruger came up with a clever way to assemble the barrel into the aluminum receiver: a barrel retainer in the form of a dovetail clamping block secured by two screws.
With the rotary magazine, each cartridge is independent of the others, and is fed at an invariant angle such that the presentation of each cartridge in turn is the same. The cartridges are isolated one from the other, preventing rim interlocking and double-feeding.
The third innovation was the “breechblock decelerator,” designed by Ruger’s Harry Sefried, who devised a means for “arresting the rearward motion of the breechblock” without adding any additional parts. By simply giving the bolt a bit of cam action, he was able to keep the 10/22’s cyclic rate reined in, contributing to the reliability and durability of the little rifle.
Thanks to Bill Ruger’s vision and the contributions of his engineers, the 10/22’s performance started off strong at its introduction in 1964 and has remained strong for more than a half-century—and about 7 million guns—without any major design changes.
The above is excerpted from The Ruger 10/22 Complete Owner’s And Assembly Guide available at scott-duff.com. The book goes far beyond the 10/22 owner’s manual in both scope and depth.
Instructions
Disassembly
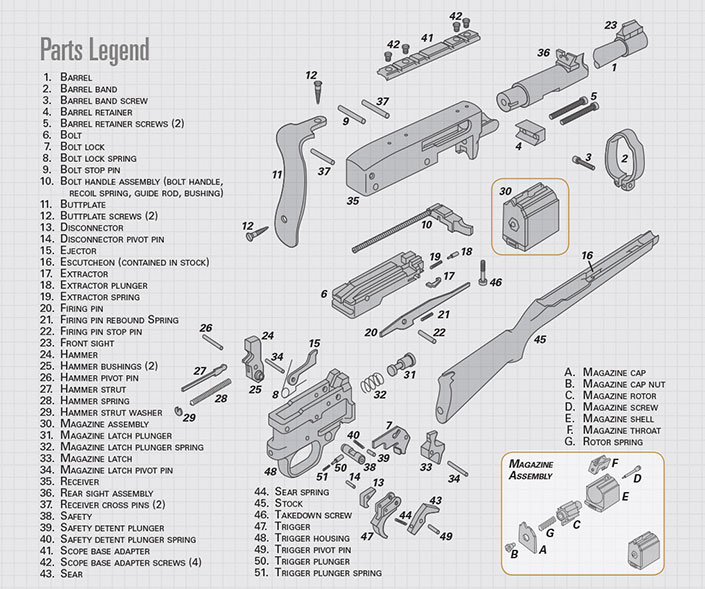
Begin by clearing the rifle. Remove the magazine (30), lock the bolt (6) back, and make sure the chamber is empty. Place the rifle inverted (upside down) on the bench. Loosen or remove the barrel band screw (3). The barrel band (2) can now be sprung open enough to be pulled forward off the stock (45) and down and off the barrel (1). Take care not to scratch the stock or barrel as you remove the band.
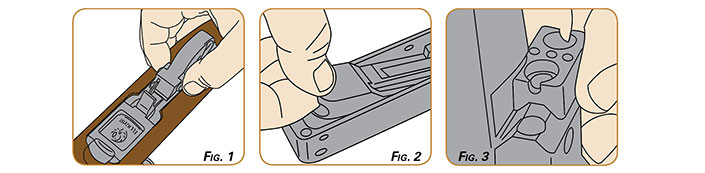
Loosen the takedown screw (46); it will be retained by the stock. Center the safety (38) in the trigger housing (48). The button must be centered in order for the trigger group to clear the stock as the stock is lifted away from the barreled action (Fig. 1).
To remove the bolt handle assembly (10), it is necessary to first remove the bolt stop pin (9). When the pin is removed, the bolt can then be moved rearward far enough to clear the bolt’s receiver guide rail. Lift up the bolt, front end first, then remove it from the receiver (Fig. 2). The bolt handle, recoil spring, guide rod and bushing are treated as one unit. Remove this unit from the receiver.
Loosen both barrel retainer screws (5), then remove the barrel retainer (4) (Fig. 3). The barrel can be pulled free from the receiver. A gentle twisting motion back and forth as you pull out the barrel is all that should be required.
Reassembly
To reassemble the bolt handle assembly and bolt in the receiver, invert the receiver. Position the pointed end of the recoil spring guide rod in its mating recess near the rear right side of the receiver (right when inverted, left when right-side-up). The recoil spring must be flat against the side and bottom of the receiver. Pull the cocking handle rearward against the recoil spring. When the spring is fully compressed, maintain it in that position with the left hand. With the right hand (for the right-handed; the left-handed should adjust accordingly), place the front end of the bolt into the receiver so that the recessed section of the top of the bolt mates to the section of the cocking handle provided for it. Press down on the rear of the bolt until a “click” is heard. At this point, allow the bolt handle (with bolt attached) to move forward slowly. Cycle the bolt handle a few times to be certain the components are correctly assembled, then install the bolt stop pin.
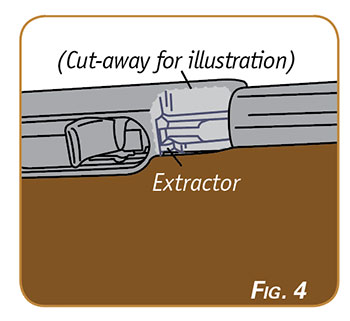 Put the trigger group into place, securing it with the two receiver cross pins. With the bolt in place, you will be able to more easily rotationally align the barrel when it is inserted into the receiver. As you slip it in, ensure that the extractor is centered within the barrel’s extractor slot. (Fig. 4). As the barrel is seated, you can peer into the ejection port; lock back the bolt, then gently run it forward. Once you are assured that the barrel is properly “clocked”—that is, rotationally aligned so that the barrel block dovetail is straight-down and the sights, if present, are straight-up—give the muzzle a rap or two with the soft end of a gunsmith’s hammer to ensure that it is fully seated.
Put the barrel block in place on the barrel and receiver dovetails. Install the screws, alternating from one side to the other. Tighten them to around 20 in.-lbs. Put the stock onto the barreled receiver, and install the barrel band. Remember to center the safety before mating the stock and barreled receiver. About 20 in.-lbs. is sufficient for the takedown screw.